Listen up, tech enthusiasts! If you're here, chances are you've been scratching your head over how to securely connect remote IoT devices using P2P SSH on an Ubuntu server. Well, you're in the right place, because we're diving deep into this topic. Whether you're a seasoned pro or just starting out, this guide will break it down step by step so you can get your IoT setup locked down tight. Let’s dig in!
In today's interconnected world, securing your IoT devices is no longer optional—it's essential. With hackers lurking around every digital corner, ensuring your remote connections are rock-solid is crucial. That’s where SSH comes in, the trusty Swiss Army knife of secure communication. But how do you make it work seamlessly with your Ubuntu server? Stick around, and we’ll show you how.
This article isn’t just another tech tutorial; it’s your go-to resource for setting up a secure P2P SSH connection between your IoT devices and your Ubuntu server. We’ll cover everything from the basics to advanced tips, ensuring your setup is not only secure but also efficient. So grab a cup of coffee, sit back, and let’s get started.
Read also:Tamil Movies Download 2025 Your Ultimate Guide To The Latest Buzz In The Industry
Understanding the Basics of Secure IoT Connections
Before we dive into the nitty-gritty, let's break down what we're dealing with. IoT (Internet of Things) devices are everywhere these days, from smart thermostats to industrial sensors. But here's the kicker: these devices often need to communicate with each other or with a central server. That’s where SSH (Secure Shell) comes into play.
SSH is like the secret handshake of the internet—it lets devices talk to each other securely, encrypting all communication to keep prying eyes out. When you're dealing with remote IoT devices, having a secure connection is non-negotiable. And that’s where Ubuntu steps in as your trusty server platform.
Why Use Ubuntu for Your IoT Server?
Ubuntu isn’t just another Linux distro; it’s a powerhouse when it comes to server setups. Here’s why it’s the perfect choice for your IoT server:
- Stability: Ubuntu is known for its rock-solid stability, making it ideal for long-term server deployments.
- Security: With regular updates and a strong focus on security, Ubuntu ensures your server stays protected.
- Community Support: A massive community of developers and users means you’ll always find help when you need it.
- Flexibility: Whether you’re running a small home server or a large-scale industrial setup, Ubuntu can handle it all.
Now that we’ve covered the basics, let’s move on to the good stuff—how to set up a secure connection.
Setting Up Your Ubuntu Server for IoT
First things first, you need to get your Ubuntu server ready for action. This involves a few key steps:
Step 1: Install Ubuntu Server
Read also:Tamil Blasterscom The Ultimate Hub For Tamil Movie Enthusiasts
Start by downloading the latest version of Ubuntu Server from the official website. Once you’ve got the ISO file, create a bootable USB drive and install it on your server machine. Follow the on-screen instructions, and you’ll have your server up and running in no time.
Step 2: Update Your System
Once your server is installed, the first thing you should do is update it. Open a terminal and run the following commands:
sudo apt update && sudo apt upgrade
This ensures you have the latest security patches and software updates, keeping your server secure from the get-go.
Tips for a Secure Installation
Here are a few tips to make your installation process smoother and more secure:
- Use strong passwords: Avoid using easily guessable passwords for your server accounts.
- Enable automatic updates: This ensures your server stays up to date without you having to lift a finger.
- Disable unnecessary services: The fewer services running on your server, the smaller the attack surface.
Configuring SSH for IoT Devices
With your Ubuntu server up and running, it’s time to configure SSH for your IoT devices. SSH is your key to secure communication, so let’s make sure it’s set up right.
Installing SSH on Ubuntu
Chances are, SSH is already installed on your Ubuntu server. But just in case, here’s how you can install it:
sudo apt install openssh-server
Once installed, you can check if the SSH service is running with the following command:
sudo systemctl status ssh
If it’s not running, start it with:
sudo systemctl start ssh
Securing Your SSH Configuration
Out of the box, SSH is pretty secure, but there are a few tweaks you can make to beef it up even more:
- Change the default port: Hackers often target the default SSH port (22), so changing it can add an extra layer of security.
- Disable root login: Allowing root login can be a security risk, so it’s best to disable it.
- Use key-based authentication: This is way more secure than using passwords and is highly recommended for IoT devices.
These simple steps can significantly improve the security of your SSH setup.
Creating a P2P SSH Connection
Now that your server and SSH are set up, it’s time to create a P2P connection between your IoT devices. This involves a few key steps:
Step 1: Generate SSH Keys
First, you need to generate SSH keys on your server. Open a terminal and run:
ssh-keygen -t rsa -b 4096
This will create a public and private key pair. Copy the public key to your IoT device using:
ssh-copy-id user@iot-device-ip
Step 2: Configure Port Forwarding
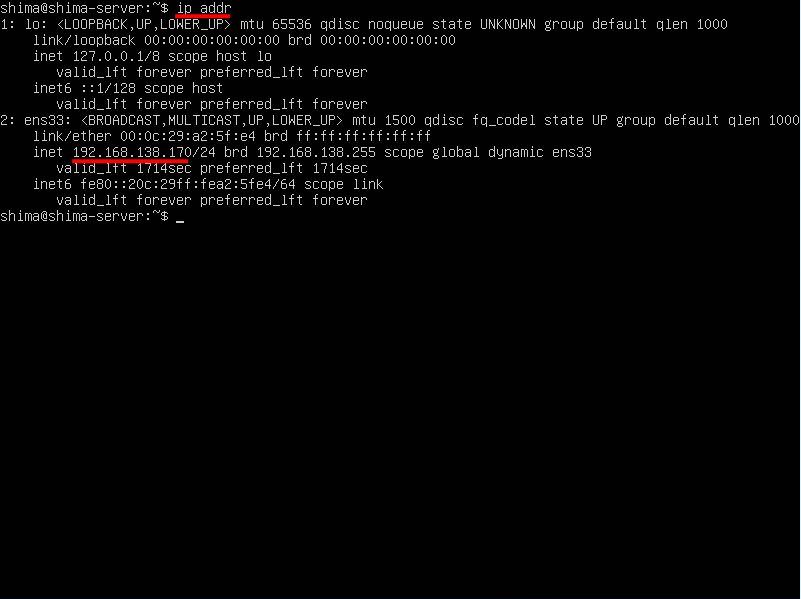
To allow your IoT devices to connect to your server, you’ll need to configure port forwarding on your router. This involves forwarding the SSH port (or the custom port you set earlier) to your server’s IP address.
Step 3: Test the Connection
Once everything is set up, test the connection by trying to SSH into your server from your IoT device:
ssh user@server-ip
If everything is working as it should, you’ll be prompted for your password (if you’re using password authentication) or connected directly (if you’re using key-based authentication).
Troubleshooting Common Issues
Even with the best setup, things can go wrong. Here are a few common issues you might encounter and how to fix them:
- Connection Refused: Check your firewall settings and ensure the SSH port is open.
- Permission Denied: Make sure your SSH keys are correctly set up and that you’re using the right username.
- Timeout Errors: Double-check your IP addresses and ensure your router is configured correctly.
With these troubleshooting tips, you should be able to resolve most issues quickly.
Best Practices for Secure IoT Connections
Securing your IoT devices isn’t a one-time thing—it’s an ongoing process. Here are a few best practices to keep your setup secure:
Regularly Update Your Devices
Just like your server, your IoT devices need regular updates to stay secure. Enable automatic updates if possible, or make it a habit to check for updates regularly.
Monitor Your Connections
Keep an eye on who’s connecting to your server. Use tools like fail2ban to automatically block suspicious activity.
Use Strong Authentication
Whether you’re using passwords or keys, make sure they’re strong and unique. Avoid reusing credentials across devices.
Advanced Tips for Pro Users
If you’re looking to take your setup to the next level, here are a few advanced tips:
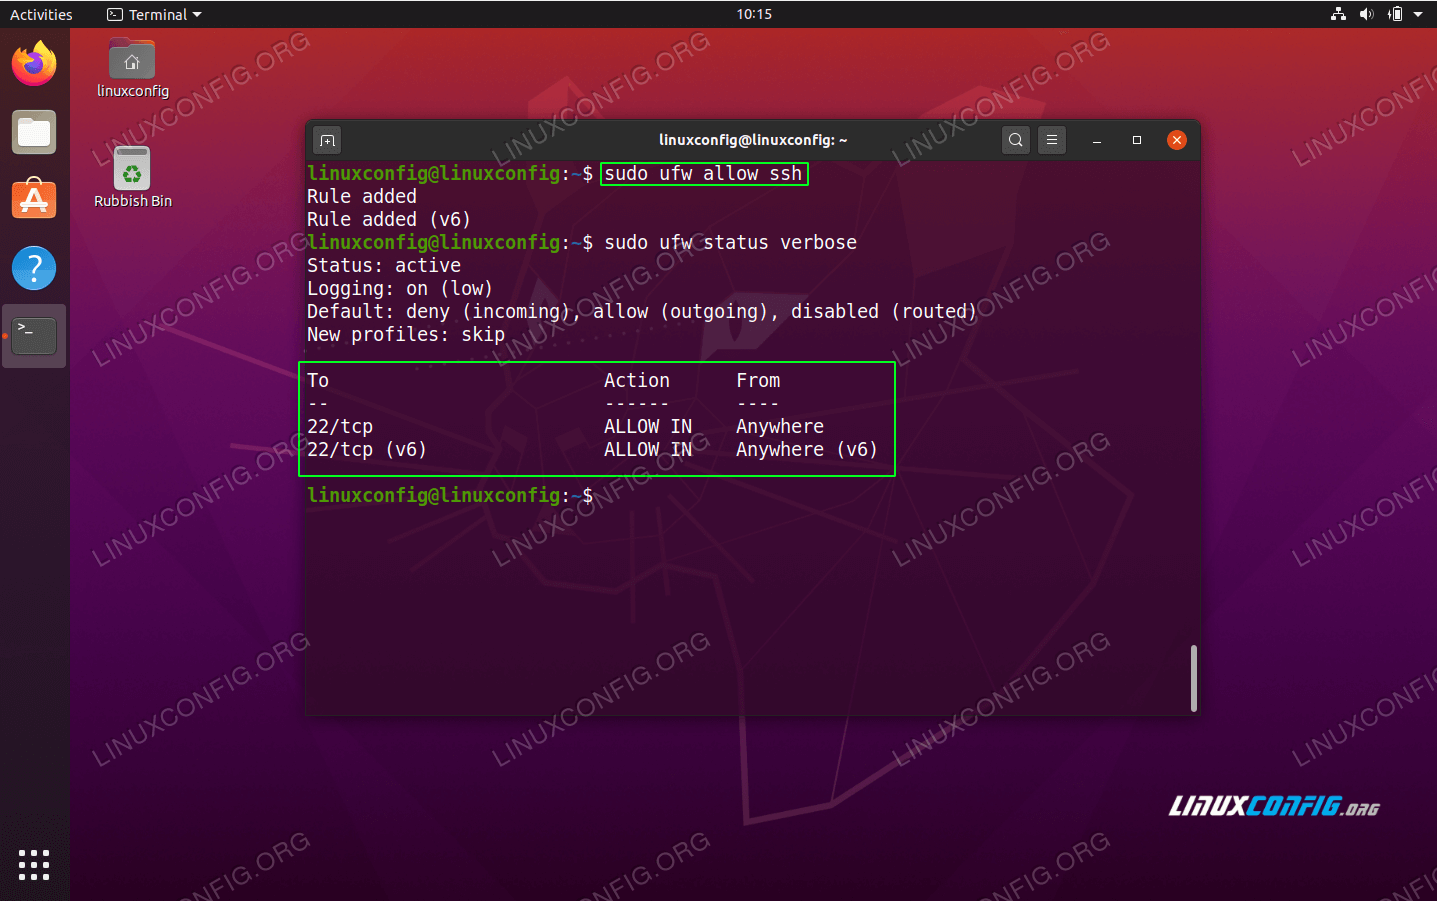
Set Up a Firewall
A firewall is your first line of defense against unauthorized access. Use tools like UFW (Uncomplicated Firewall) to set up a basic firewall on your Ubuntu server.
Implement Two-Factor Authentication
Adding an extra layer of security with two-factor authentication (2FA) can significantly reduce the risk of unauthorized access.
Encrypt Your Data
Even with SSH, encrypting your data at rest and in transit is a good idea. Use tools like GPG or OpenSSL to encrypt sensitive information.
Conclusion
And there you have it, folks—a comprehensive guide to securely connecting remote IoT devices using P2P SSH on an Ubuntu server. By following the steps outlined in this article, you can ensure your setup is not only secure but also efficient and scalable.
So what are you waiting for? Get out there and start securing your IoT devices. And don’t forget to leave a comment or share this article if you found it helpful. Until next time, stay safe and keep hacking!
Table of Contents
- Understanding the Basics of Secure IoT Connections
- Why Use Ubuntu for Your IoT Server?
- Setting Up Your Ubuntu Server for IoT
- Configuring SSH for IoT Devices
- Creating a P2P SSH Connection
- Troubleshooting Common Issues
- Best Practices for Secure IoT Connections
- Advanced Tips for Pro Users
- Conclusion